Few days back I talked about that how you can use the Login control in ASP.NET 2.0 to authenticate against the credentials stored in the custom database. In this article I will show you that how you can the CreateUserWizard to insert create new users for your application.
Introduction:
Few days back I talked about that how you can use the Login control in ASP.NET 2.0 to authenticate against the credentials stored in the custom database. In this article I will show you that how you can the CreateUserWizard to insert create new users for your application.
| You can check out the article in which I used the ASP.NET 2.0 Login Control to authenticate a User against custom database by using this link: Authenticating Using Login Control |
Application Configuration:
The first task that you need to perform is to configure your SQL SERVER 2000 database so that it can store membership details. The easiest way is to use the aspnet_regsql.exe tool which will open graphical wizard and guide you to configure your custom database to hold membership details. After providing the information to the wizard you will see few tables created in your database. You can view the screen shot here.
The next task is to set the authentication mode to "Forms". Take a look at the code below which shows how to achieve that:
| <authentication
mode="Forms"> <forms loginUrl="Default.aspx" protection="All"></forms> </authentication> |
Now, you need to do the Membership configuration. I will be using SQL SERVER 2000 as my data store meaning the data will be stored in the tables which were created automatically when I ran aspnet_regsql.exe. Here are the membership configuration details.
| <membership
defaultProvider="MyMembershipProvider"> <providers> <add name="MyMembershipProvider" connectionStringName="ConnectionString" type="System.Web.Security.SqlMembershipProvider" requiresQuestionAndAnswer="false" requiresUniqueEmail="false" minRequiredPasswordLength ="3" minRequiredNonalphanumericCharacters="0" /> </providers> </membership> |
As, you can see the name of the defaultProvider is "MyMembershipProvider". In the <providers> section I have defined the provider, "MyMembershipProvider" which takes the connectionStringName named "ConnectionString". The type of the provider is SqlMembershipProvider. The additional properties that I have used are explained below:
requiresQuestionAndAnswer: This represents that if you want your user to enter a secret question and answer.
requiresUniqueEmail: This property is used when you want to take email as input and email must be unique.
minRequiredPasswordLength: This property sets the minimum length of the password.
minRequiredNonalphanumericCharacters: The number of nonalphanumeric characters required for the password.
There are much more properties that you can set for a full list of properties please visit Membership Provider members.
Customizing the CreateUserWizard Control:
I have also customized the CreateUserWizard control since I don't want the question & answer section. Here is the screen shot of my registration page.
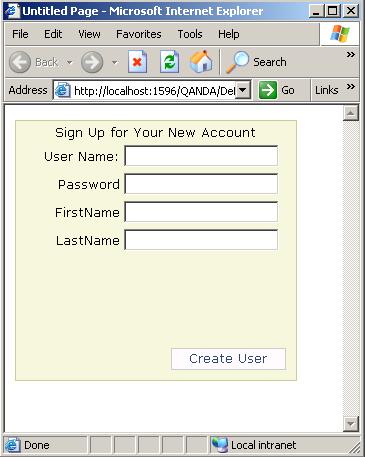
| The UserName and Password are compulsory. If you omit either UserName or Password a runtime exception will be thrown. |
Since, you have already configured the Membership settings the data will be stored in the the aspnet_Users and aspnet_Membership tables.
Storing the information in custom database:
You can also store the data in your own custom database. All you need to do is to use the CreatingUser method of the CreateUserWizard. Check out the code below where I have send the data to my own custom method which in turn will save the data in my custom database.
|
string
userName = CreateUserWizard1.UserName; string password = CreateUserWizard1.Password; string firstName = ((TextBox)CreateUserWizard1.CreateUserStep .ContentTemplateContainer.FindControl("txtFirstName")).Text; string lastName = ((TextBox)CreateUserWizard1.CreateUserStep .ContentTemplateContainer.FindControl("txtLastName")).Text; CreateUser(userName, firstName, lastName); |
As, you might already noticed that I am retrieving the text out of the custom TextBoxes that I added in the CreateUserWizard control. The TextBoxes are contained inside the ContentTemplateContainer. I am using the id of the TextBoxes to locate them as you can see in the code above.
You can implement the CreateUser method on your own. I hope you liked the article, happy coding!
| If you are one of the
thousands that visit GridViewGuy for your .NET articles and resources, you
might be interested in making a donation. Extra cash helps pay for the
hosting services and speed things up
around here, and makes this website possible.
Once, again thank you very much and remember its because of you FINE people that this website is up and running. |
| Export Button is a custom control that let's you export your DataGrid or TextBox data to several different formats. The control is extremely easy to use and also exposes design time features. In this article I will discuss some of the features of the Export Button and how it benefits the developer. |