Sometime back I visited a website that had the drag and drop shopping cart feature. Users can simply drag and drop the items they wish to buy in the basket and the basket is updated with the new results. I was extremely impressed with this feature and decided to create a small application that does the same. In this article I will implement a page which enables the users to drag and drop the items they wish to buy into the shopping basket. The shopping basket items and the price will be updated. The code presented in this article is browser compatible.
Introduction:
Sometime back I visited a website that had the drag and drop shopping cart feature. Users can simply drag and drop the items they wish to buy in the basket and the basket is updated with the new results. I was extremely impressed with this feature and decided to create a small application that does the same. In this article I will implement a page which enables the users to drag and drop the items they wish to buy into the shopping basket. The shopping basket items and the price will be updated. The code presented in this article is browser compatible.
NOTE: Before reading this article I highly recommend reading the article Drag and Drop Using JavaScript.
The Database Design:
I used SQL SERVER 2005 Express to create a simple database called “ToyShopDatabase”. The database contains a single table “tblToys” which contains four columns.
ToyID: The identity column is used as a primary key.
Title: The title of the toy.
ImageUrl: The image url of the toy.
Price: The price of the toy.
I have populated the database with some dummy data. Let’s now see how we can display the data on the page.
Displaying Data on the Page:
I have used DataList control to display the data on the page. Check out the BindData method below which is used to retrieve the data from the database.
private void BindData()
{
string connectionString = ConfigurationManager.ConnectionStrings["ConnectionString"].ConnectionString;
SqlConnection myConnection = new SqlConnection(connectionString);
SqlDataAdapter ad = new SqlDataAdapter("SELECT * FROM tblToys", myConnection);
DataSet ds = new DataSet();
ad.Fill(ds);
dlToys.DataSource = ds;
dlToys.DataBind();
}
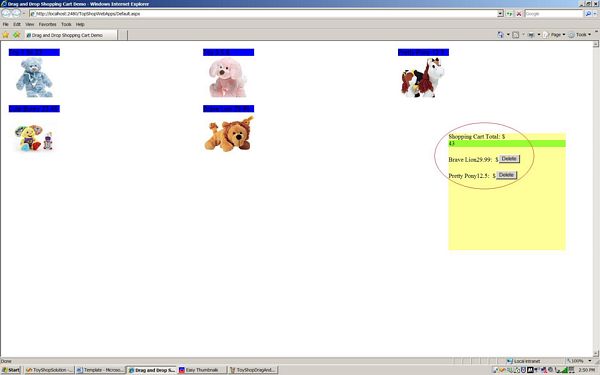
You can see the items displayed on the page in the screen shot below:
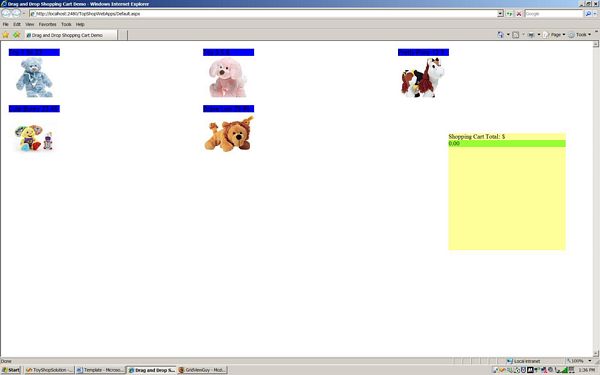
You can also see the shopping cart displayed on the left side of the screen. The shopping cart displays $0.00 since there are no products added to the cart.
The interesting thing is the HTML code for the DataList. Let’s check it out.
<asp:DataList Height="100%" Width="100%" ID="dlToys" runat="server" RepeatColumns="3" CellPadding="20" CellSpacing="20">
<ItemTemplate>
<div ID="a" runat = "server" class="dragElement">
<asp:Label ID="lblTitle" runat="server" Text='<%# Eval("Title") %>' />
<asp:Label ID="lblPrice" runat="server" Text = '<%# Eval("Price") %>' />
<asp:Image ID="imgPicture" runat="server" ImageUrl='<%# Eval("ImageUrl") %>' />
</div>
</ItemTemplate>
</asp:DataList>
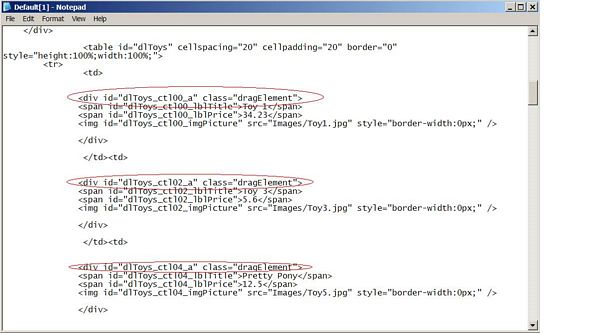
As, you can see in the code above I have added a <DIV> element inside the ItemTemplate of the DataList control. This means that each product is contained inside the <DIV> element which will serve as a draggable object. The <DIV> control will have a unique ID since I have added the runat=”server” attribute. The unique ID will be assign by ASP.NET at runtime as shown below:
Making Elements Draggable:
At this point we know that our DIV elements will serve as the draggable objects. But there can be several DIV controls on the page which will not be a part of this drag and drop feature. We will use regular expression to filter the correct DIV elements.
<script>
var dragElementPattern = ".+_a$";
var divElements = document.getElementsByTagName("div");
for(i=0;i<divElements.length;i++)
{
if(IsMatch(divElements[i].id, dragElementPattern))
{
MakeElementDraggable(divElements[i]);
}
}
</script>
First, I retrieve all the DIV elements on the page and then find the correct ones using the regular expression. The IsMatch function is responsible for matching the element’s ID with the pattern.
function IsMatch(id, pattern)
{
var regularExpresssion = new RegExp(pattern);
if(id.match(regularExpresssion)) return true;
else return false;
}
Dragging the Cloned Element:
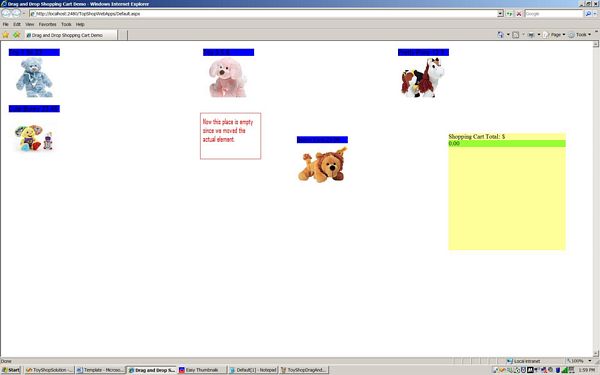
Cloning the drag element is necessary to get the correct effect. If you don’t clone the element then you will be moving the actual element itself which looks kinda weird. Take a look at the screen shot where I have moved the actual element without cloning.
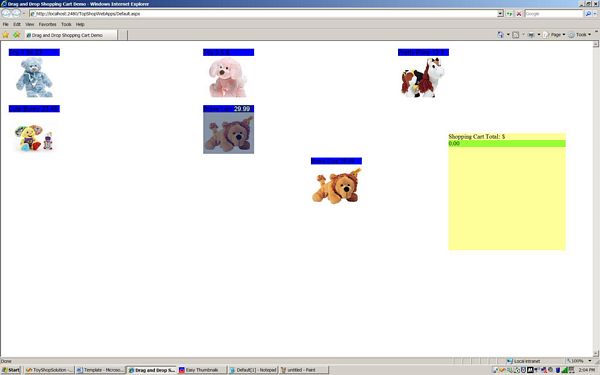
And here is the effect when the clone is created.
Here is the code that initiates the drag and creates the clone.
function InitiateDrag(e)
{
mouseState = 'down';
var evt = e || window.event;
startX = parseInt(evt.clientX);
startY = parseInt(evt.clientY);
clone = obj.cloneNode(true);
clone.style.position = 'absolute';
clone.style.top = parseInt(startY) + 'px';
clone.style.left = parseInt(startX) + 'px';
document.body.appendChild(clone);
document.onmousemove = Drag;
document.onmouseup = Drop;
return false;
}
Dropping the Element in the Drop Zone:
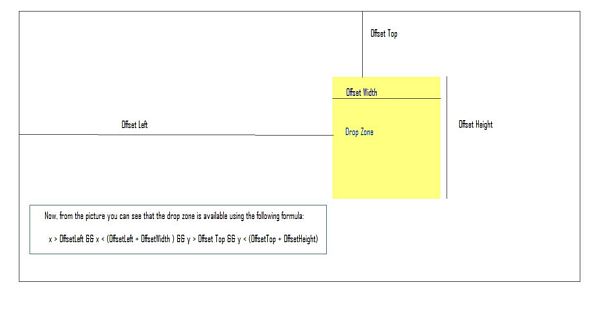
I had some hard time creating a browser compatible drop zone event. The Drop is only successful when the product is dropped inside the drop zone. In my article Drag and Drop Using JavaScript I used the parent approach where I found the element based on the mouse position. But unfortunately, that approach was not browser compatible. The approach that is discussed here is browser compatible and it based on the mouse position and the drop zone position on the page. Take a look at the diagram below which explains how to get the drop zone position.
 And Here is the code for dropping the product in the drop zone:
function Drop(e)
{
var evt = e || window.event;
var evtTarget = evt.target || evt.srcElement;
var dZone = document.getElementById("dZone");
if( evt.clientX > dZone.offsetLeft && evt.clientX < (dZone.offsetLeft + dZone.offsetWidth)
&& evt.clientY > dZone.offsetTop && evt.clientY < (dZone.offsetTop + dZone.offsetHeight))
{
AddPrice();
}
document.onmouseup = null;
document.onmousemove = null;
document.body.removeChild(clone);
mouseState = 'up';
ResetColor();
}
If the product is not inside the drop zone then the product just disappears. However, if the product is inside then it is added to the shopping cart.
Adding the Product to the Shopping Cart:
The AddPrice function is responsible for updating the total price and the display of the shopping cart. Each product is embedded inside the DIV element which is later added to the DropZone DIV container.
function AddPrice()
{
var title = GetProductTitle();
var price = GetProductPrice();
var dZone = document.getElementById("dZone");
var textNode = document.createTextNode(title);
var priceNode = document.createTextNode(price);
var spaceNode = document.createTextNode(': $');
var paragraphElement = document.createElement('p');
// create the delete button
var deleteButton = document.createElement('button');
deleteButton.value = 'Delete';
deleteButton.innerHTML = 'Delete';
deleteButton.onclick = DeleteItem;
var item = document.createElement('div');
item.id = 'itemDiv' + uniqueNumber;
item.appendChild(paragraphElement);
item.appendChild(textNode);
item.appendChild(spaceNode);
item.appendChild(priceNode);
item.appendChild(spaceNode);
item.appendChild(deleteButton);
dZone.appendChild(item);
// increment the price
IncrementTotal(price);
uniqueNumber++;
}
The GetProductTitle and GetProductPrice are used to retrieve the title and the price from the draggable product. The uniqueNumber is a global variable which is used to create a unique ID for the newly created DIV element. The uniqueNumber is incremented each time a new product is added to the drop zone. The IncrementTotal function is used to add the product’s price to the total price.
Check out the image below which display two products added to the shopping cart.
Deleting the Item from the Shopping Cart:
Once, the product is added to the shopping cart it is displayed with the delete button. Delete button is used to remove the product from the shopping cart and adjust the total balance.
function DeleteItem(e)
{
var evt = e || window.event;
var evtTarget = evt.target || evt.srcElement;
if(IsFireFox())
{
price = evtTarget.parentNode.childNodes[2].nodeValue;
evtTarget.parentNode.parentNode.removeChild(evtTarget.parentNode);
}
else
{
price = evtTarget.parentElement.childNodes[2].nodeValue;
evtTarget.parentElement.parentElement.removeChild(evtTarget.parentElement);
}
DecrementTotal(price);
}
Since, the code to access the child nodes is different for different browsers I have created an IsFireFox function which returns true if the user is using FireFox browser. First, we retrieve the price of the product and then remove the product from the shopping cart. Finally, the DecrementTotal is called which adjusts the total balance.
Shopping Cart Animation:
Now, let’s see our shopping cart animation in action.
IE:

FireFox:
Improvements:
Recommended
1) Drag and Drop Using JavaScript by Mohammad Azam
Conclusion:
In this article we learned how to create draggable objects and drop them in the shopping cart.
I hope you liked the article, happy coding!
http://www.codeproject.com/aspnet/DragAndDropShopping.asp