In this article we shall continue presenting the InfoPath 2007, WSS 3.0 and VS .NET 2005 technologies. We shall see today: A) how to design InfoPath 2007 form templates in VS .NET 2005 B) what changes are necessary in order to create an InfoPath 2003 compatible form template C) how to add data connections D) how to publish to WSS 3.0 an InfoPath form template
Introduction
In this article we shall continue presenting the InfoPath 2007, WSS 3.0 and VS .NET 2005 technologies. We shall see today:
A) how to design InfoPath 2007 form templates in VS .NET 2005
B) what changes are necessary in order to create an InfoPath 2003 compatible form template
C) how to add data connections
D) how to publish to WSS 3.0 an InfoPath form template
A) Designing InfoPath Forms Templates
We shall design two InfoPath forms templates in VS .NET 2005, one for the employee request addressed to the manager in which he requests approval for his spending and another which represents the manager's answer.

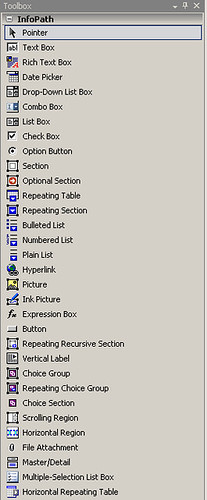
After creating an InfoPath form template project in VS .NET 2005 you can now start designing in the manifest.xsf. In the left of the VS .NET you will find a Toolbox with the controls you can use to the new form. There is an important thing you must keep in mind. If you choose "Enable browser-compatible features only" when you created your form template then you will have less controls in the Toolbox.

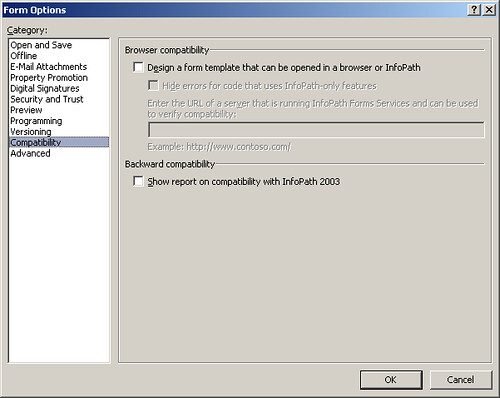
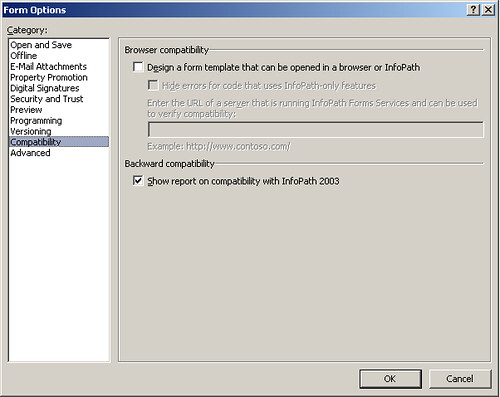
Of course we can change our minds and change the form settings in order to have more controls and in the same time more options on how to design our form template. For this you go to Tools menu and select Form Options. Choose Compatibility and uncheck "Design a form template that can be opened in a browser or InfoPath". You can see that our Toolbox just got bigger including new list controls (bulleted, numbered, plain), choice controls (group choice, group repeating choice, choice section), scrolling region, horizontal region, file attachment, master detail or multiple-selection list box controls.
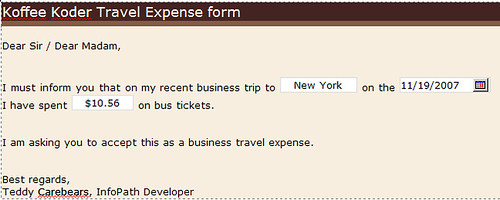
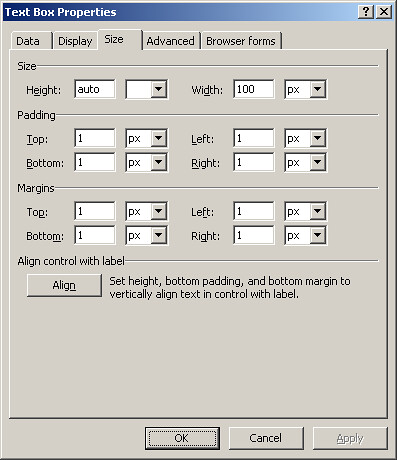
For the moment we shall design a simple form with a lot of plain text, 2 textboxes and a date picker. We right click the textbox where we enter the name of the city in which we have travelled and we choose Text Box Properties. I have named this text box "txtLocation" and given it the value "New York". When you first drag a text box control from the Toolbox to the manifest.xsf you will see that the textbox width is 100% but you can choose the Size tab and give the control the disered dimensions.

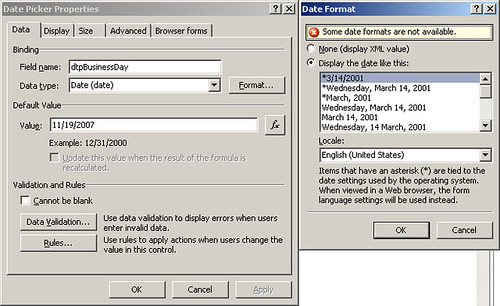
The date picker control is named dtpBusinessDay and has a Date data type and the value 19/11/2007. If you choose "Format..." button you will see different date formatting options from which you can pick the one you need. You cal also notice that there is a red circle in front of the message "Some date formats are not available". That is because server forms just do not support some date formats.
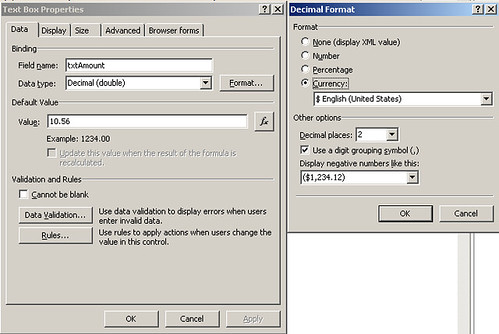
Last control is a text box in which we keep the amount we spent. It is called txtAmount, has the value of 10.56 and double data type. You can see that I selected Currency in the Format window in order to have the dollar sign showed in the text box.
After designing the form and setting the properties for the controls all you have to do is to choose a data connection and to publish your form template to a SharePoint library.
B) Creating InfoPath 2003 Compatible Forms Templates
InfoPath 2007 offers support for saving InfoPath 2003 compatible forms. This is a great feature because if your manager decides to provide you with the latest and the greatest technologies like InfoPath 2007 you can also have in mind customers that have only InfoPath 2003 installed on their computers.
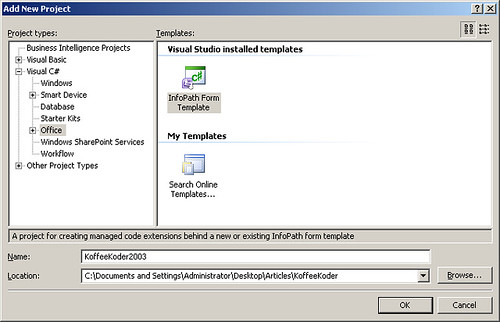
Add a new project called KoffeeKoder2003 to the solution.
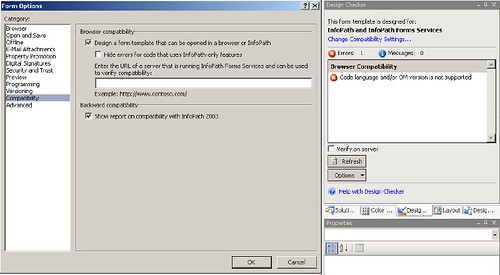
Double clicked manifest.xsf in Project Explorer to be sure you are in design mode. Select Tools menu, Form Options and in Compatibility tab be sure to have unchecked "Design a form template that can be opened in a browser or InfoPath" and also to have checked "Show report on compatibility with InfoPath 2003". It is very useful because it gives detailed explanations regarding compatibility issues.
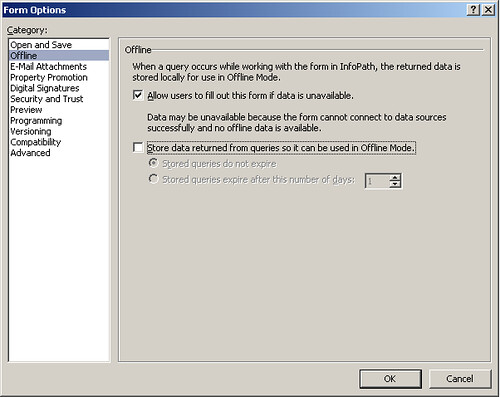
In the Offline tab I also choose not to allow data returned by the queries to be used offline. I can retrieve all the data when the form is opened and to define rules for all the fields from my form. So there is no need to store it locally.
There are some issues related to programming languages used in InfoPath forms templates but we shall talk about them in a future article dedicate to InfoPath programming.
C) Adding Data Connections
A data connection is the mechanism that helps developer to populate the form templates with data taken from a web service, a database, a XML document or even a SharePoint library. You can also submit your data form to these data sources or you can send it by email.
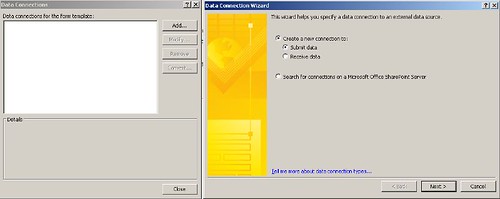
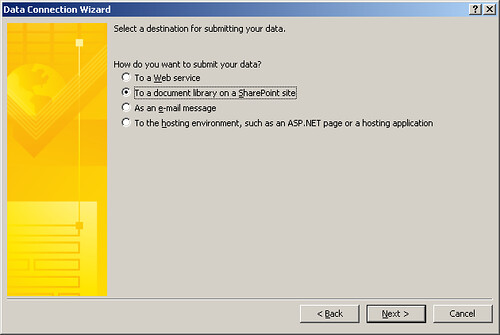
Select the KoffeeKoder project and in the Data menu select "Data connections...", select "Add...", select "Create a new connection to:" and choose "Submit data". Click "Next" and choose "To a document library on a SharePoint site" when asked to select a destination for submitting your data.
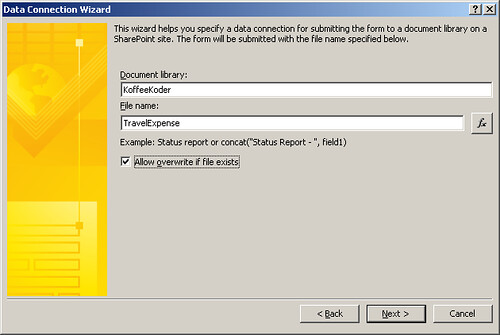
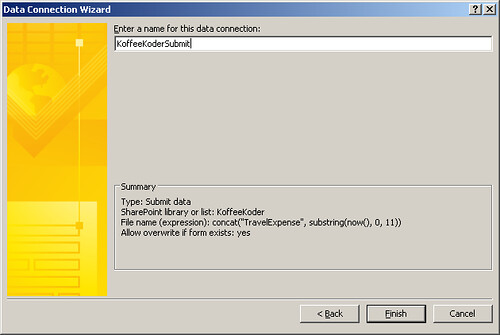
You will be asked to input the name of the SharePoint library and the name of the file that will be saved on the library. If you want to upload a document to the library and that document already exists on the server you can choose "Allow overwrite if file exists". I named my file KoffeeKoder but this is a good practice only if this is the only travel expense I shall ever have. If we do the the document saving programmatically usually it is better to click the "fx" button and to use a formula to name you file.
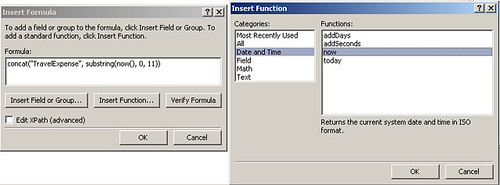
In your formula you can insert fields, groups or functions. In this example I used 3 functions concat, substring and now. The formula can look like this:
concat("TravelExpense", substring(now(), 0, 11))
It is a good practice to "Verify formula" in order to avoid later errors. Please remember this: I have learned from practice that InfoPath errors are hard and very hard to find when you are just beginning developing InfoPath forms templates.
After you complete editing your formula click "OK", click "Next" to move forward in setting our SharePoint library, enter a name for the data connection and click "Finish".
D) Publishing to WSS 3.0 an InfoPath form template
After creating a submit connection you are now just one step away from having the form template published. So select Build menu and then select Publish. If you did not uncheck "Design a form template that can be opened in a browser or InfoPath" then an error is raised. Select the blue link "Change Compatibility Settings..." from the Design Checker and make the corrections.

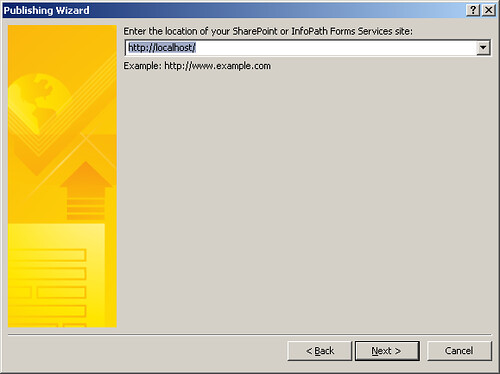
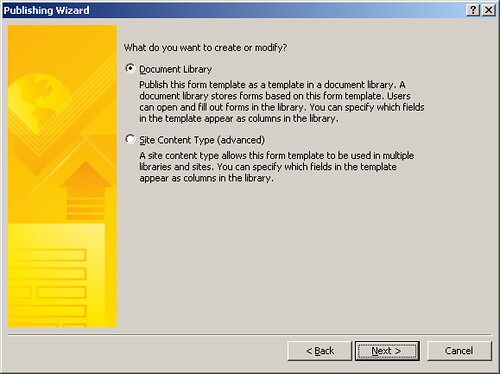
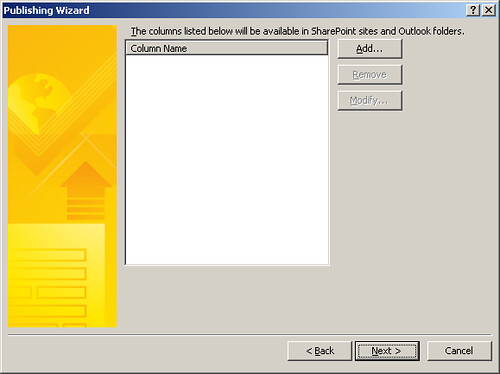
Select again Build menu and Publish. Chose that you want to publish to a SharePoint server, click "Next", enter the location of your server. The location can be "http://localhost/" if you have a SharePoint server installed on your local computer. Click "Next", select that you want to create a Document Library, click "Next", choose that you want to "Create a new document library", click "Next"', enter name and a description for your library and click "Next". There will be no column available to SharePoint for the moment so click "Next" and then, after checking the information, click "Publish". You will receive a confirmation message that your form was published successfully and you can click "Close". Remember that you must have the appropriate rights on the SharePoint server in order to create a document library.


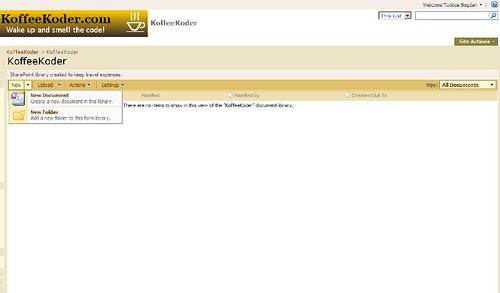
The new document library is ready and you can start creating InfoPath documents.
About the Author:
Full Name: Tudose Bogdan Costin
Born: 31st of August 1980
Married and father of a little girl.
Working since 2004 as developer in .NET (both C# and VB .NET, 1.1 and
2.0) with Access and SQL Server as databases. During this period I
also programmed in VBA for Office suite since 97 until 2007.
My latest programming curiosities are concerning InfoPath, SharePoint
and workflow programming.
What I always loved in IT are the databases and this is why I have the
same productivity no matter if it is SQL Server, SyBase, Oracle, MySQL
or any other database.