In the previous article we discussed how to build a custom server control from scratch. In this article we will demonstrate how to inject custom JavaScript with our custom server control.
Injecting Inline JavaScript:
The first method to inject JavaScript is simple. Simply use the Page.ClientScript.RegisterClientScriptBlock to register the JavaScript with the page. Here is the RegisterClientScripts method which is fired before the OnPreRender event.
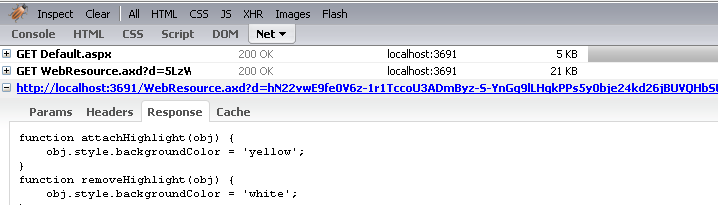
The above JavaScript changes the background color of the TextBox to "Yellow" when the focus is placed inside the TextBox and reset it back to "White" on the blur event.
ReBuild the solution and refresh the page which contains the RequiredTextBox control. You will notice that now the custom JavaScript is injected into the page and the control works as expected. The problem with the above approach is that now the JavaScript has become part of the page. This increases the size of the page and is rendered every time the page is rendered. The above JavaScript is inline and thus is not cached by the browser. Let's see how we can leverage the WebResources to solve this problem.
Using WebResource to Inject JavaScript:
First add a JavaScript file and put all the client side code inside the JS file. Mark the JS file as embedded resource and put the following line in the AssemblyInfo.cs file.
The RegisterClientScripts method implementation is shown below:
Rebuild your application and refresh the page. You will notice that the page works as expected but now it has a resource attached to it. This resource is called a WebResource and it can be cached by the browser. This means if the user comes to the same page or request the same resource from another page then it will be fetched from the browser cache instead of the server. This will improve the performance specially if the JavaScript files are large.
Conclusion:
In this article we learned how to use WebResource to inject client side scripts with the custom server control. In the next article we are going to discuss how to change the ICON for the custom server control.
References:
1) Creating a RequiredTextBox Control in ASP.NET
2) Screencast: Building RequiredTextBox Custom Control
3) Screencast: Custom RequiredTextBox with ValidationExpressionValidator
4) Screencast: Injecting Client Script for RequiredTextBox Control
5) Screencast: Building RequiredTextBox Embedding WebResource
6) Screencast: Creating ICON for RequiredTextBox Control
[Download Sample]