In ASP.NET 1.X and ASP.NET 2.0 DataList was the primary control used to display data in groups. In ASP.NET 3.5 we have a new control that takes care of grouping data. In this article we are going to demonstrate how to group data using the ListView control.
Database Schema:
Our database schema consist of two tables, Customers and Orders. The database diagram is shown below:
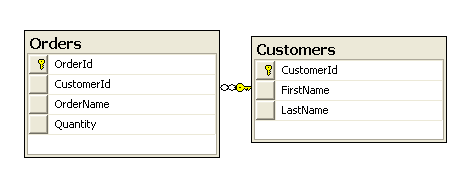
The Customers table has one to many relationship with Orders. This means a single customer can have multiple orders.
Binding the Data to the ListView Control:
There are many ways of fetching the data from the database. We have used LINQ to SQL as a data access layer but you are free to use any data access strategy. The following code fetches the data from the Customers table and binds to the ListView control.
Creating the ListView Control:
Now, it is time to create the ListView control. Since we need to group the items we will use the GroupTemplate when specifying the structure of the items. The ListView also consists of the GroupItemCount property which represents the number of items grouped together. First take a look at the ListView LayoutTemplate implementation:
The LayoutTemplate represents the overall structure of the ListView control. It consists of the PlaceHolder control which will be replaced by the HTML contained in the GroupTemplate. The GroupPlaceholderID is also specified on the ListView control.
The GroupTemplate uses a PlaceHolder control which is later replaced by the ItemTemplate. You can consider GroupTemplate as a section which displays the actual data using the ItemTemplate control. However you can also edit the GroupTemplate. Here is the implementation of the GroupTemplate:
The itemPlaceHolder will be replaced by the contents of the ItemTemplate. The ItemTemplate implementation is shown below:
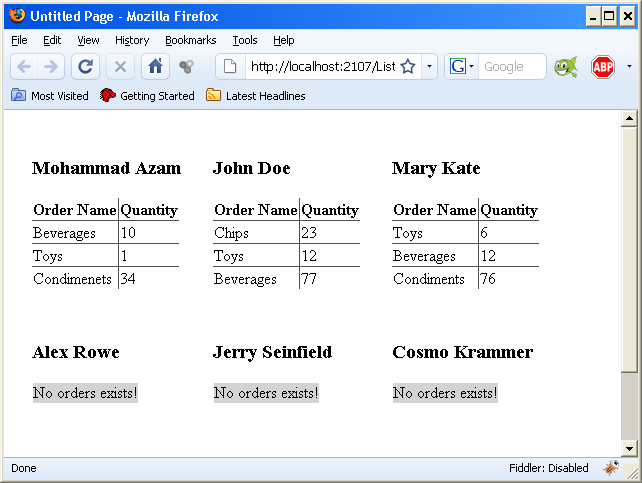
We have used a separate GridView control to display the products of the customer. The customer who have no products associated with them will be handled by the EmptyDataTemplate.
The effect is shown in the screenshot below:
Conclusion:
In this article we learned how to use the GroupTemplate feature of the ListView control. The GroupTemplate allow us to display the data in small sections specified by the GroupItemCount property of the ListView control.
[Download Sample]