Build scripts are used to perform tasks like compiling the application, running unit tests, executing code coverage tools, building documentation etc. Nant is the most common build configuration script used in the .NET world. Nant is XML based and hard to maintain and configure. In this article we will demonstrate how the simplify build scripts by using Rake.
Installing Rake:
First you need to download and install Ruby on your machine. This is done easily by using Ruby One Click Installer which can be downloaded at the following link:
Ruby One Click Installer
After installing Ruby on your machine you need to download Rake. Rake is downloaded as a Ruby Gem using the following command run from the Ruby console:
gem install rake
The above will install rake gem on your machine and you will be ready to harness the power of Rake.
Rake for Dummies:
Before we dive into the complicated stuff let's take a moment to learn the basic of Rake. Rake is a Ruby gem and when ran it will search for the "default" task to execute. Everything in Rake is a task. You can think of task as a step to be executed. Create a Ruby file and call it "rakefile". Now go to the directory where you created the file and type rake
By default rake command will try to execute the "default" task. Since, our rakefile.rb is currently empty you will see the following message:

Let's add a default task to the rake file and execute again.
Now, run "rake" again and you will notice that the "default" task gets executed.

Apart from running the default task by using the rake command you can also run any custom task using "rake taskname". In the code below we have added a new task called compile:
And here is the result:

Adding Description to Your Tasks:
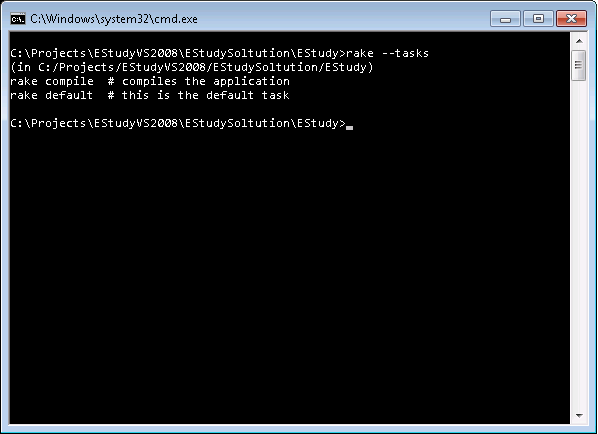
You can associate description with your tasks using the desc keyword. Description will allow other developers to know more about your tasks. The code below adds the description to the "default" and "compile" tasks.
You can view the tasks and their description using the "rake --tasks" command.
Adding Dependencies Between Tasks:
You can make your task dependent on other tasks. This means that your task will run only when the other tasks have been executed. Let's see dependencies in action.
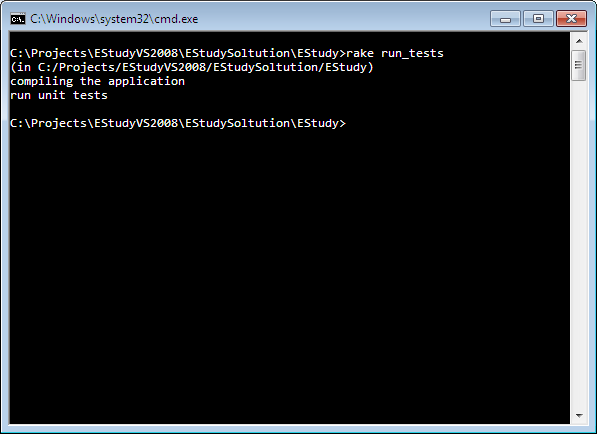
We have added a new task to our rake file. The purpose of this task is to run unit tests. But this task must be run after the compile task is executed. It means the "run_tests" task has a dependency on the compile task. The below implementation shows the dependency added to the "run_test" task.
Now, if you trigger the "run_tests" task the "compile" task will also be executed as shown in the screenshot below:
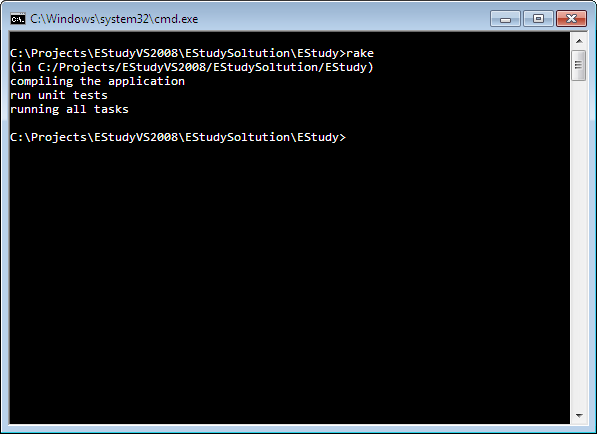
Even better you can add dependencies for the "default" task which means that when you type "rake" it will automatically execute all the dependent tasks.
In the above code the "default" task invoke the "all" task which invokes all the other tasks. The screenshot below shows the result:
This was the basic introduction to the rake framework. In the next section we will demonstrate how to build, run unit test and create documentation for a .NET application using rake. If you are interested in learning more about Rake then check out this tutorial.
Using Rake to Build the Solution:
One of the cool things about rake is that it can invoke executable using a shell command. You can invoke any ".exe" file using the "sh" command as shown below:
The above command will open notepad application. Using the same technique we can invoke "msbuild.exe" to build our application. The task below shows how to achieve it:
The variables "DOT_NET_PATH" and "SOLUTION" are defined below:
You can invoke the "compile" task using the following code:
The solution is build and you will get a similar output:
Our next task is to run the unit tests which is explained in the next section.
Running Unit Tests Using Rake:
Just like before you can invoke "nunit.exe" to trigger the task. We are invoking the "nunit-console.exe" but you can invoke any unit testing framework you desire.
The screenshot below shows the output when "test_domain" was executed.
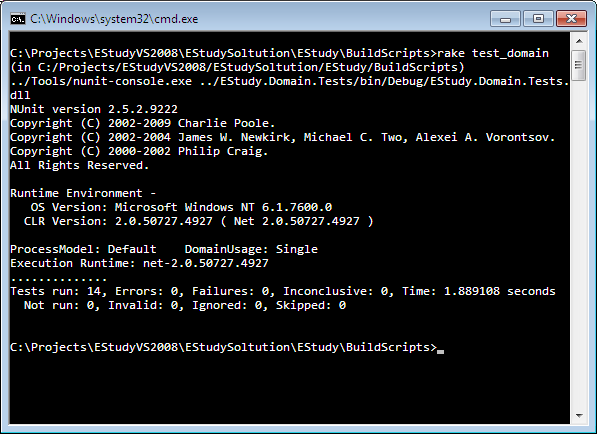
As, you can see all the 14 unit tests were executed and all of them passed. If any unit test fails then it will be indicated clearly in the output.
Building Documentation Using Rake:
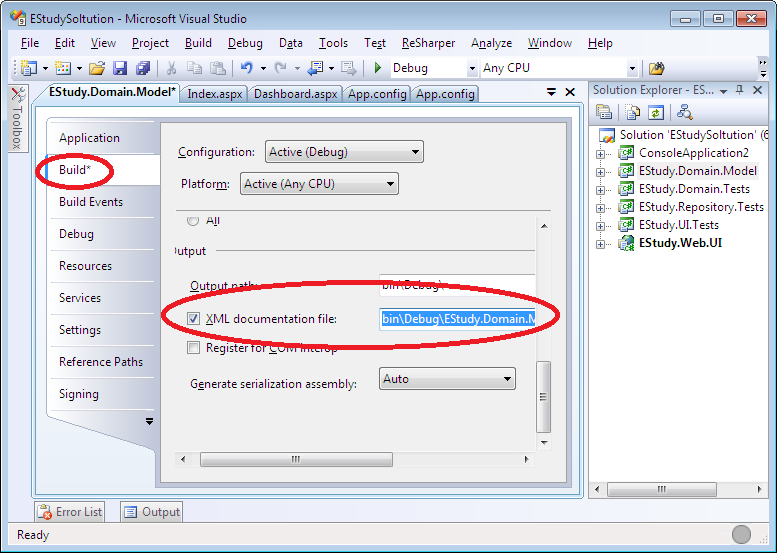
There are tons of tools available to build documentation using the assembly. In this article we are going to use NDoc3. In order to create documentation you must make sure that "XML Comments" are enabled on your project. The screenshot below shows how to enable XML comments for a project.
Now, you can easily invoke the NDoc3console.exe from your rake task as shown below:
Usually you will not execute this task whenever someone checks in the code since it takes time to build documentation. This task should be executed once daily and not with every successful check-in.
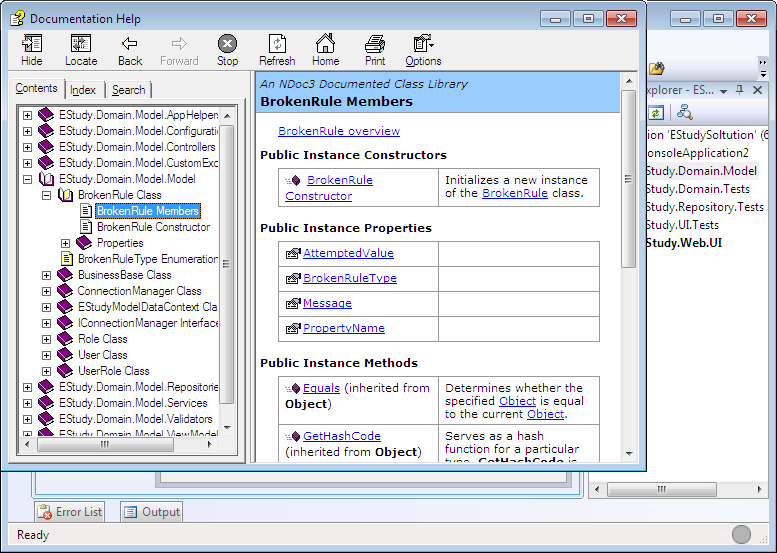
The result is shown below:
Pretty cool right!
References:
1) OMG Rake!
2) Ruby on Rails Rake Tutorial
Conclusion:
In this article we learned how to use Rake to build our project. The article focused on building the application, running unit tests and creating documentation for the application. In the next article we will focus on how to inject different configuration settings when performing a integration and production build.
You can download the code from GitHub using the following clone URL:
git@github.com:azamsharp/EStudy.git